Last updated on
When you upload an X-ray, it is essential to establish the correct image orientation and perform calibration. Once you have completed the upload of an image, the “Uploaded Images Window” will appear. To successfully finalize this process, you need to select the appropriate view and calibration method for each uploaded medical image, followed by validating your selections.
View Selection Orientation
When selecting the display for your image, you have the option to choose either the Anterior-Posterior (AP) or Lateral (LAT) view.
Calibrate image
It is important to define the X-ray scaling factors for accurate image calibration. PeekMed web offers three methods for setting this calibration: manual, automatic, and magnification. By default, the system selects automatic calibration, but you have the option to change this method as needed. Please note that once the image configuration is set, you will receive a confirmation message regardless of the calibration method you choose.
To simplify this process, you may click the “SET FACTOR AS 100” button, which will automatically set the magnification factor to 100% upon your confirmation of this action.
Warning: It is crucial to ensure that all images are acquired correctly. During the X-ray acquisition process, take care to avoid any oblique positioning, abduction, or external rotation of the patient's anatomy for optimal results.
Automatic
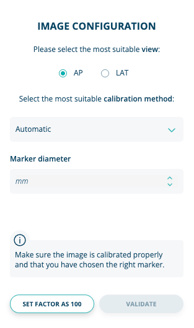
You have the option to set the image scaling based on a marker that is positioned at the patient's bone level during the image acquisition process.
When you choose the automatic scaling option, a circle will appear over the marker automatically.
At this point, you simply need to adjust the size of the circle to fit the marker and enter the marker's diameter in millimeters in the designated Diameter field. It is important to provide the actual size in this section.
If the system is unable to detect the marker for automatic calibration, you will receive a notification, and you can then choose an alternative calibration method.
Manual
To set the image scaling manually, you will need to use an object positioned at the patient's bone level, commonly referred to as a marker, during the image acquisition process.
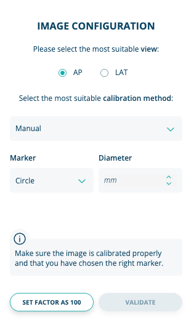
Begin by selecting the manual scaling option; this allows you to draw either a line or a circle and specify its actual size in the designated Ruler or Circle fields, respectively.
To draw a line, simply choose the Ruler option, which will add a default line to your image. You can then reposition and resize this line by clicking and dragging its endpoints (handles) with the left mouse button.
Once adjusted, enter the length of the ruler in millimeters in the appropriatefield. If your image features a circular marker, such as a sphere, select the Circle option. A circle will appear automatically for you to resize to match the marker, after which you should input the diameter in millimeters. It is essential to accurately specify the actual size in the designated scaling section.
Please ensure that the scale object is correctly aligned with the image calibration marker to obtain accurate measurements.
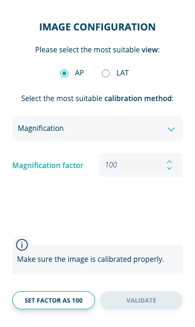
Magnification
You can specify a magnification percentage by selecting the Magnification option, which allows you to determine how much the image is scaled.
Typically, X-rays are adjusted to a range of approximately 100% to 115% of their actual size.
To complete this step, simply enter the desired scaling percentage in the provided text box.