Last updated on February 4 2025
Description
Total hip replacement is a procedure where the joint is replaced by an implant. In this procedure, there are several parameters to analyze:
- Limb length discrepancy: the transischial line is used to measure any leg length difference. Limb length discrepancy up to 1 cm is well tolerated;
- Center of Rotation: the anatomical center of rotation of the femoral head should be reproduced by the position of the acetabular component. Acetabular and femoral component positioning should mimic normal anatomy. The distance from the center of the femoral head to the teardrop (or another identifiable landmark) should be equal bilaterally. Excessive lateral positioning of the acetabular component increases the risk for dislocation and may cause limping;
- Femoral Offset: the distance from the center of rotation of the femoral head to a line dissecting the long axis of the femur (in case the patient has an implant, the femoral offset is considered the distance from the center of rotation of the femoral head to a line bisecting the long axis of the stem). Femoral offset affects the mechanics of the hip in the replacement. A normal femoral offset is about 30 mm and 60 mm.
Measurements
The measurements made by the procedure are displayed in the image:
- Femoral Offset (FO): length between AAF and a Hilgenreiner parallel line through the center of the femoral head;
- Limb Length Discrepancy (LLD): the difference between the length of both LTL.
- Centrum-Collum-Diaphyseal (CCD): The angle between the femoral shaft axis and a femoral neck axis.
- Femoral Head Diameter (FHD): distance between the Most lateral edge of the femoral head and the center of the femoral head multiplied by 2.

Auxiliary references
To show this procedure, PeekMed® needs additional references:
- Anatomical Axis of the Femur (AAF): line from the center of the proximal femur to the center of the distal femur;
- Hilgenreiner’s line: a horizontal line through the teardrops (or triradiate cartilage in children) of the acetabulum;
- Lesser Trochanters’ Line (LTL): perpendicular line to the Hilgenreiner’s line, finishing at the proximal edge of each lesser trochanter;
- Femoral Neck Axis (FNA): line that passes through the center of the femoral head and neck.
- Cup placement line: a line that passes through the center of the femoral head and intersects the Hilgenreiner’s Line at a 45° angle;
How to perform
With automatic landmark detection
After selecting the procedure in the sidebar, as well as the side where you will perform the procedure, PeekMed will analyse the image and detect the landmarks.
If the detection is successful, the landmarks will be placed automatically. You can adjust them before approving the placement.
If it's not possible to detect the landmarks automatically, you will be prompted to place them manually.
You can enable/disable the automatic landmark detection in Settings.
Without automatic landmark detection
After selecting this procedure in the sidebar, as well as the side where you will perform the procedure, you must mark the points to conclude it. To see the caption of each point you need to click on this button .
Beware: You can change the position of the points at this stage or later. To do this, simply click on each handle with the left mouse button and move them to the most suitable position.
For advanced configuration, please follow the instructions below.
Advanced Configuration
With the advanced configuration of this procedure it is possible to automatically insert templates, place them in the planning and perform the resection of the femoral head.
This feature can only be performed with XR (with modalities CR, DX, RF, and OT) and
Conventional images in the 2D environment with specific template systems.
To initiate the advanced configuration you need to click the button in the object card. PeekMed will then check the local database to validate if all required templates are present. If there is one or more templates missing from a specific system you are prompted to download the ones that are missing, as you can see in the image below.

It will direct you to the download manager and show you the templates that are available for this procedure.

You can then select the ones you want to work with and download them.
When you have at least one complete template system you can then start the configuration. The first step will be to choose the template manufacturer for the system you are going to use.
If you haven't downloaded all the available templates you can click the "Download more" button to access the download manager again.

After selecting start you will be able to select the cup component, its size and features. To configure the cup placement you can click "Cup placement" and the window will be replaced by the sliders which will allow you to configure the placement and inclination.
Clicking "Next" will take you to the Stem selection and placement window. Same as with the cup, you will be able to choose the component, its size and features. Clicking "Stem placement" will allow you to choose the placement and inclination of the stem.
|
|
|
|
|


Next you will select the type of resection you want to be performed: Straight or Step. PeekMed will then perform the femoral resection with (Step) or without (Straight) greater trochanter sparing.

PeekMed will then validate the components selections and placement, generate the fragment and perform the components alignment.
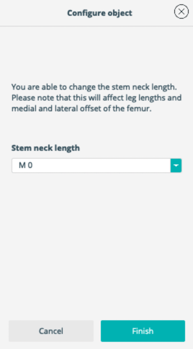
Lastly, you will be able to select the stem's neck length.
All these steps are demonstrated in the video below.