If you are using an X-Ray:
The calibration step is mandatory with CRs or conventional images due to the unknown magnification factor at the time of image acquisition. Thus, you must define CRs’ or conventional images’ scaling factors.
If you are working with more than one CR or conventional image, this step will be required for all the images. After completing one image, the software automatically switches to the next one, up to a limit of four CRs or conventional images.
PeekMed allows three ways of setting the image calibration: manual, magnification and automatic. You can select which calibration method is selected by default on Settings.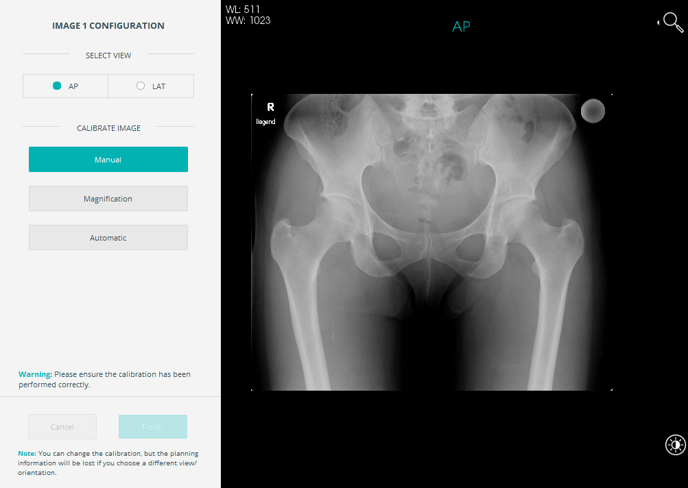
Beware: Ensure all images used have been correctly acquired. During the acquisition of CRs, pay attention to avoid oblique positioning, abduction or external leg rotation.
Manual Calibration
You can set the image scaling based on an object placed at the patient's bone level (commonly known as a marker) at the time of image acquisition. When you select the manual scaling option, you must draw a line or a circle and identify its real size in the field Ruler length or Circle diameter, respectively.
You can either manually enter a value or select a value from the auto-complete list. PeekMed will save the last 5 distinct values inserted.
When you select the field, it becomes automatically filled with the latest inserted value. When there are no values in cache, 25 mm is inserted as default in the Circle diameter field and 100 mm is inserted by default in the Ruler length field.
To draw the line, you must select the Ruler option. A default line will be added to the image. Then, you can reposition and resize this line by clicking on its extremities (handles) with the left mouse button.
If the image has a circular marker (e.g. a sphere) in it, choose the Circle option. A circle will automatically appear as soon as you click on this option. Then, you only need to resize it according to the marker. The actual size must be specified in the appropriate field, in the scaling section.
Beware: Ensure that the scale objects are correctly positioned on the image marker in order to perform the measurement.

Magnification
When there is no known measurement, you can define a percent magnification factor, selecting the Magnification option, which defines the percentage at which the image is scaled to. Magnification is only available for CR images. Usually, CRs are scaled to a value of around 100% - 115% of their actual size. To perform this step, you must enter the most appropriate scaling percentage in the text box.

Beware: Magnification is performed without a verifiable scaling object. This scaling method is not recommended. It cannot be used if there is no available data for the image calibration, for example, if the image has a .jpeg, a .png, .bmp, .tiff format.
Automatic Calibration
By clicking on this option, the software tries to find a marker in a CR or conventional image, displaying a contour around it (circle).
Afterward, it is possible to define the diameter of the detected circle. You can either manually enter a value or select a value from the auto-complete list. PeekMed will save the last 5 distinct values inserted.
When you select the field, it becomes automatically filled with the latest inserted value. When there are no values in cache, 25 mm is inserted as default.

After clicking Finish a warning message pops-up so you can confirm that the correct marker was detected.
Beware: Ensure that the scale object is correctly positioned on the image calibration marker to perform the measurement.
If you are using a CT:
As with the calibration of CRs and conventional images, CTs and MRIs also need to be configured. You must specify the orientation of the image that will be used for planning. You must choose at least one of the three options - Axial, Coronal and/or Sagittal.

In order to have a better perception of the patient’s data, you can change the orientation of the image in Set Oblique Planes. By moving (rotating and translating) the crosshairs, it’s possible to change the perspective of the CT to then be used in the planning view. It is possible to revert the changes made by clicking on the Reset button. The changes are applied to both 2D and 3D renderers in the planning view.

Beware: By moving the crosshairs you might change the orientation that is being displayed (you might be changing a left side to the right side, for example). Make sure you correctly set the image orientation.
If you want to know more about image calibration we invite you to check this post on our blog.