The next step will be to import the images that you will be working with. There are different ways you can import the images and different formats you can use.
With PeekMed you can work with Computed Radiography (CR), Computed Tomography (CT), Magnetic Resonance Image (MRI) and conventional image files that will act similar to CRs. The CR, CT and MRI images should be in DICOM format.You have different options to import the images and we will explain them below.
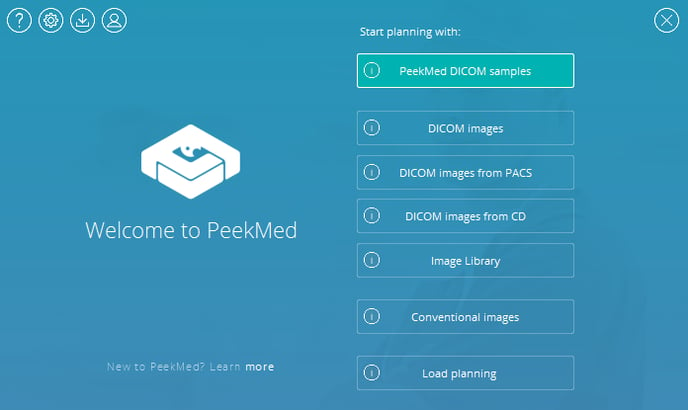
PeekMed DICOM samples
PeekMed provides a set of sample images in case you want to test the application but don’t have any medical image to use. These images are only available during the trial period.
DICOM images
You can open images in DICOM format (X-rays, computerized tomography - CT and magnetic resonance imaging - MRI) stored in your computer.
DICOM images from PACS
This option allows you to access images stored in the PACS and import them to PeekMed. To use this feature you must previously configure the integration with said PACS. You can find more information about PACS integration here.
DICOM images from CD
You can open images from a CD if you have a CD drive. After inserting it, you must click on this option and the software will open the digital images.
Image library
Open previously loaded DICOM images. Find more information about the Image Library here.
Conventional images
In this option you can open images with any other file format (e.g. .jpeg, .png).
Load planning
If you have already saved a previous planning, you can reopen it from this option. Depending on where you saved this planning, you can reopen it from the cloud or disk. A saved planning has .pmd file as a file extension.
On this window you can also find and access other menus such as About, Template Download and Profile. As with Settings, these menus can also be accessed in File Menu.
Templates Download
PeekMed offers the possibility to insert the templates of prosthetic materials to be used during the surgery. It includes an extensive template database with templates for each of the subspecialties available.
This menu allows you to access the download manager for the template database. You can either download the templates now or later in the Template menu in the planning window.
The database is divided into two sources: Server and Local. Template Source: Server is where you have access to the entire template database and can search and select the ones you want to download. You can search by name or use the filters provided for Manufacturer, Subspecialty or Type. After finding the templates, you can simply check the box on the left to select them and click the Download button. This is demonstrated below:
After the download is completed, the templates will be transferred to Template source: Local.
You can later access these templates in the Template menu and add them to your plan.
Profile
Here you can access your user account, change your password, first and last names and log out of the software. This menu can also be accessed through the File Menu and on our website after logging in.