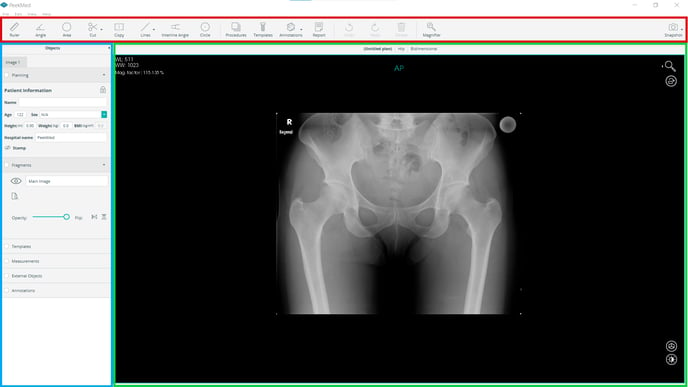
Planning window
Now you are ready to start planning! Here you have at your disposal a set of measuring tools, a digital library of prosthetic materials representations (Templates) and a group of wizards that will help you perform the procedure digitally, according to the medical image of the patient.
Your planning window is divided into 3 sections: the Toolbar, the Objects and the Renderer.

The Toolbar appears at the top of the planning window and it is common to every environment and subspecialty. It contains the measuring tools, procedures and templates menus, among others. You can find more information about the Toolbar here.
The Objects section is on the left side of the window and displays all the objects available in the planning. This includes fragments, templates, measurements and external objects. You have more information about each object here.
Depending on the environment you are working on, the Renderer will be different. As we have shown in the “Selecting the environment and subspeciality” section, the 2D environment will only display the 2D renderer, hybrid will display the 2D and 3D renderers side by side and 3D environment will only display the 3D renderer. For more information about the options available in the Renderer, head on over to the “Planning Interactions” section.